As a part of our flutter tutorial series, we’re going to learn how to capture images from a camera using flutter with example.
What we’re going to learn?
- Fetch all available cameras
- Render a camera Preview
- Capture Image & Display Image
Packages we’re going to work with:
Usage:
you can use this package, where ever you want to use a camera, like a social app for posting photos, add a product page, and more.
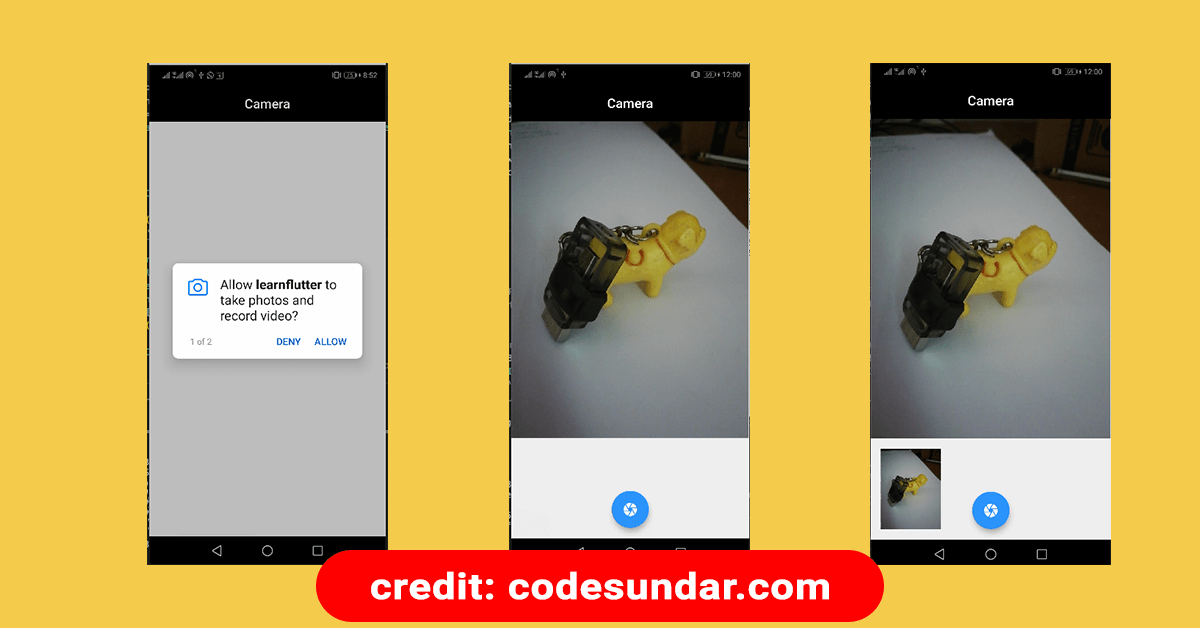
Flutter Camera Example
To implement this example, first, we need to create a new project or you can use the existing project.
flutter create learnflutter
cd learnflutter
Then, we need to add the required packages inside pubspec.yaml and run flutter pub get to install all required packages
dependencies:
  camera:
  path_provider:
  path:
Source code
class _HomePageState extends State<HomePage> {
  CameraDescription camera;
  CameraController controller;
  bool _isInited = false;
  String _url;

  @override
  void initState() {
    // TODO: implement initState
    super.initState();

    WidgetsBinding.instance.addPostFrameCallback((_) async {
      final cameras = await availableCameras();
      print(cameras);
      // setState(() {});
      controller = CameraController(cameras[0], ResolutionPreset.medium);
      controller.initialize().then((value) => {
            setState(() {
              _isInited = true;
            })
          });
    });
  }

  @override
  Widget build(BuildContext context) {
    return Scaffold(
      appBar: AppBar(
        title: Text("Camera"),
      ),
      body: Container(
        height: double.infinity,
        width: double.infinity,
        // child: _isInited ? CameraPreview(controller) : Container()
        child: Column(
          children: [
            Expanded(
              child: _isInited
                  ? AspectRatio(
                      aspectRatio: controller.value.aspectRatio,
                      child: CameraPreview(controller),
                    )
                  : Container(),
            ),
            Container(
              height: 152,
              child: Row(
                mainAxisAlignment: MainAxisAlignment.spaceBetween,
                children: [
                  Container(
                    height: 120,
                    width: 120,
                    child: _url != null
                        ? Image.file(
                            File(_url),
                            height: 120,
                            width: 120,
                          )
                        : Container(),
                  ),
                ],
              ),
            )
          ],
        ),
      ),
      floatingActionButton: FloatingActionButton(
        child: Icon(Icons.camera),
        onPressed: () async {
          final path = join(
              (await getTemporaryDirectory()).path, '${DateTime.now()}.png');
          await controller.takePicture(path).then((res) => {
                setState(() {
                  _url = path;
                })
              });
        },
      ),
      floatingActionButtonLocation: FloatingActionButtonLocation.centerFloat,
    );
  }
}
Explanation:
- We create a CameraController to listen to camera actions.
- During
initState(), we have updatedCameraControllerobject with available camera - We have used
CameraPreview()to render the selected camera output. - When the user presses the
FloatingActionButton(), we need to capture images usingtakePicture(). since it requires a path to store images, we usedgetTemporaryDirectory()to get Temp folder. - final output stored on
_urlvariable and displayed usingImage.file()